I always have a handful of projects in-process at any given time. And one of my favorite, year-round projects are Crocheted Hats for Good Causes.
Did you know that there are tons of organizations that are in need of homemade hats? If you do a quick Google search, you'll find all sorts of people who are organizing hats for cancer patients, homeless people, veterans, and more. With that in mind, throughout the year I crochet hats of different sizes and colors, and then every few months I pack them up and send them to a new charity.
I have lots of fun making these hats, so I usually have lots of different hats "in progress," as you can see!
Now, I have to admit, I am still a novice crochet-er, so I am pretty terrible at reading instructions. But I didn't let that stop me from creating this very basic hat design. I actually make all of my Crocheted Hats for Good Causes using this simple pattern that I came up with. I try to use soft yarn and a smaller hook so my stitches will be tight- this makes for a very warm hat, which I suspect the eventual recipients appreciate!
1. I start by crocheting a circle. There are lots of tutorials online, but basically I single crochet 6 and join the stitches to create a ring. Then I make two single crochet stitches in each of the initial stitches around the ring, so I have 12 stitches around.
2. For the next round, I make two single stitches into the first stitch, and then one single stitch into the second. I do this for the entire round, so I have 18 stitches around. For the fourth ring I stitch two single stitches into the first stitch and single stitches into the next two stitches, so I have 24 stitches around... are you getting the picture?
3. As I continue increasing each round, the circle grows...
4. And grows...
5. And the circle grows until it is as big as I want the top of my hat to be. Once I think the circle is big enough to cover the head I have in mind, I stop increasing my rounds. But not increasing, the circle stops growing and starts growing up!
6. Of course, I love a little color, so I sometimes switch yarn colors for a few rows which adds a band of color to the hat.
And after lots of crocheted rounds, my hat is finally finished!
Since I'm not sure who will end up receiving my hats, I try to make them versatile by crocheting them extra long so people can fold over the bottom if they choose!
There you have it - a very simple way to crochet Hats for Good Causes. If you have some extra yarn lying around, this is a great way to help out those in need! Now, I'm off to the post office because I have a box of hats on their way to new owners!
CROCHETED HATS FOR GOOD CAUSES SUPPLY LIST
Yarn (soft and washable if possible)
Crochet hook
Scissors
I love apples! I have very fond memories of traipsing through the apple orchard in my hometown on brisk, fall mornings, my boots damp with dew as I munched on a cold apple I'd snagged from a low hanging branch. I tell you, nothing tastes as good as an apple picked right from the tree- heavenly!
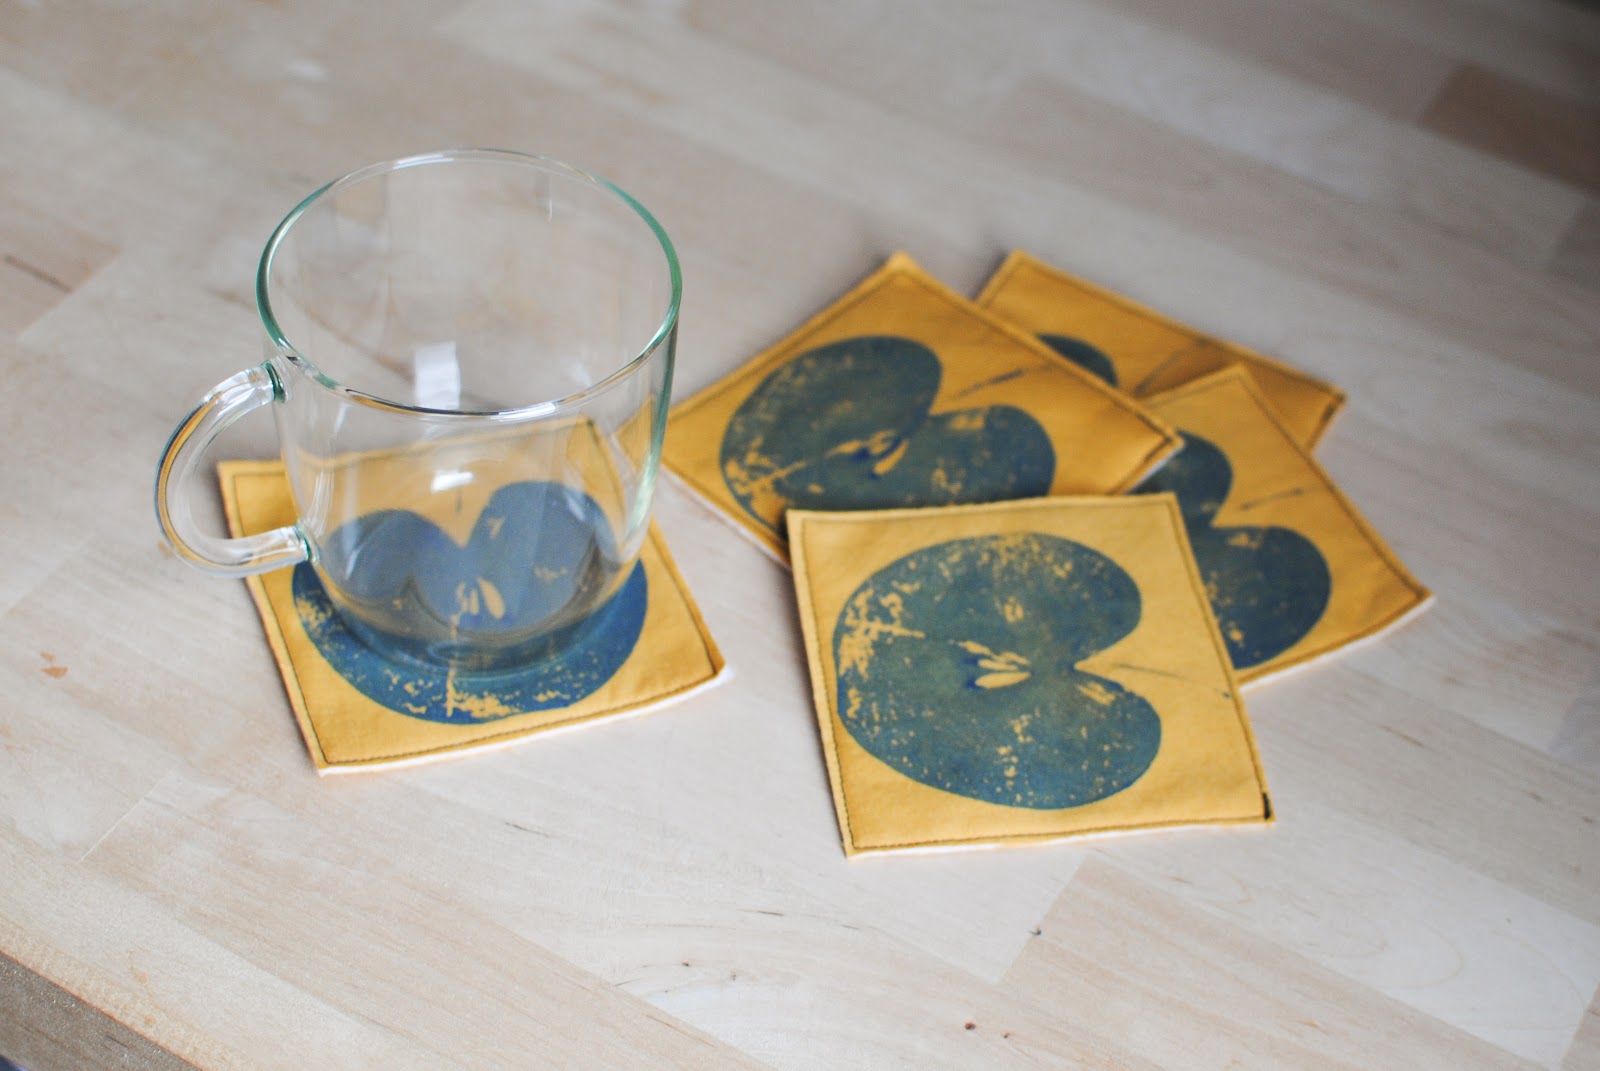
Well, the other day I spotted some apple prints online and wanted desperately to incorporate something similar into my life! And that's how I came up with these Apple Print Coasters.
1. I started with the usual cast of characters: acrylic paint, fabric with coordinating thread, iron-able batting, and an apple (please ignore that bias tape - it didn't end up being used in my project!).
2. Using a rotary blade since I'm not the straightest cutter when using scissors, I sliced my fabric into 4 inch squares. Once the fabric was prepared, I sliced an apple and prepped my paint.
3. And then it was time to print! My apple was especially juicy, so before I lathering paint on the apple using a foam brush, I wiped it with a paper towel to remove the excess apple juice.
4. Next up: stamping! I didn't want my prints to be completely perfect, so I only reapplied paint between every 2 stamps. I was also careful to also paint the stem of my apple, which I think makes the prints even easier to distinguish. After I had finished stamping, I left my prints to dry for a couple of hours.
5. Once the prints were dry, it was time to assemble! I ironed the batting between two pieces of 4 inch fabric (one of which had been printed upon), and kept things together with a couple of straight pins.
6. Once everything was ironed, I turned to my trusty sewing machine.
7. I ran a simple stitch around the perimeter of the coaster and I ended up using a contrasting thread to make things really "pop."
8. Then I quickly cut the edges off each of the coasters, leaving a but of fabric around my sewn edges... and I was finished!
As I found out, 4 inches seemed to be the perfect size for most of my glasses/mugs as well as the perfect size for my stamping apple!
Of course, I couldn't stamp in a single color, so I added a few red and green apples to my coaster stash.
These little coaster were SO easy to whip up, I made some extras that I packaged up with a little baker's twine. I think a stack of coasters, along with a box of tea or a pretty new mug, will make great "get well soon" gifts this winter when my friends and family get a cold!
APPLE PRINT COASTERS SUPPLY LIST
Cotton fabric
Iron-able batting
Thread
Scissors
Paint
Foam paint brush
Apple, cut in half
Iron
Sewing machine
If you've visited this blog before, you're well aware that I like to make craft projects out of objects I have lying around my house. And this project is no different! Here's how I whipped up this Fall Bottle Centerpiece.
I started with four, brown glass bottles of old beer (you'll notice that none of the beer is seasonally appropriate- go figure, right?).
After a few minutes under hot water, I was able to scrape and peal the labels off the bottles. Then I gathered a few more project materials (acrylic paint and a bundle of twine) and got to work!
I started by painting the word "fall" on the bottles, one letter at a time. Since I didn't need the paint to be permanent, I used plain acrylic paint rather than paint specifically formulated for glass.
Once the paint was dry, I started wrapping the bottles with twine. I anchored the twine with a bead of hot glue and carefully wrapped the twine around the bottles in two sections per bottle (one section on top of the painted letter and one section on the bottom).
And in no time at all, I was finished with the bottles!
When I first came up with this plan, I had hoped to put branches full of colorful leaves in the bottles (I'm sure you've seen similar things all over the blogosphere). However, Hurricane Sandy blew all of the beautiful leaves off the trees in my neighborhood, so that wasn't an option for me.
So I improvised and turned my centerpiece into a candelabra of sorts. I grabbed some shorty candles I got at the dollar store a while ago and plunked them into the bottles
How's that for a seasonal centerpiece?
FALL BOTTLE CENTERPIECE SUPPLY LIST
4 brown bottles
Acrylic paint
Twine
Paint brush
Hot Glue
Candles (optional)
I absolutely loved the the felt I used to make my Autumn Felt Garland, and since I had some felt left over after that little project I decided to whip up some Felt-bottomed Leaf Coasters.
I started with the usual suspects: some cork coasters, felt, coordinating acrylic paints, and paper leaves (you might recognize those from my Thanksgiving Pumpkin).
I began the project by tracing the leaves onto the coasters. Then I painted the leaf shapes using acrylic paint and outlined the leaf shape with a contrasting paint color.
Once the paint was dry, it was time to apply the felt bottoms.
I cut circles out of the felt (I made the circles slightly smaller than the cork coasters), and glued them to the bottoms of the painted coasters using Tacky Glue.
And in no time at all, I had glued felt to the bottoms of all my coasters.
And once the glue dried, my coasters were finished. Cute, right? And more importantly, simple!
And when the coasters are all wrapped up with ribbon and accompanied by a bottle of sparkling wine, they make a great hostess gift!
FELT-BOTTOMED LEAF COASTERS SUPPLY LIST
Cork coasters (I got mine at Muji)
Felt
Acrylic paint (I used Americana)
Paint brush
Scissors
Tacky Glue
Leaf templates (optional)
I don't get into Halloween as much as some folks, and I was feeling a little guilty that I didn't have a single bit of festive decor to represent today's holiday... so I quickly whipped up a little Creepy Window Painting.
Window painting is a simple, inexpensive way for me to add a bit of holiday festivity to my casa. And one of my favorite places to paint is on the window on the bathroom door: it's an old door/window, and the glass is faceted with makes paintings blurry and cool! Here's a brefore shot of my plain, ol' door.
1. For my creepy project, I started with some acrylic paint, painter's tape, old paint brushes, a print out of my creepy saying, and...
2. DISH WASHING SOAP! I know, it may sound strange, but hear me out...
3. By mixing a bit of soap with my paint, it makes clean-up on my window way easier when the holiday is over! (FYI: I initially planned to use a couple of paint colors, but after I got started I decided to use plain old black paint.)
As I mentioned, the glass in my door is faceted, which means one side is smooth and one side is not. For painting purposes, I like to paint on the smooth side (obviously). Plus, since I wanted my creepy painting to read correctly in the hallway and not in the bathroom, I taped my printed saying to the front of the glass and painted on the backside. That's kind of confusing to write, so I hope the picture is helpful! Also, I used a bunch of painters tape around the window frame since my door is white and I was painting with black paint... but I'm cautious like that!
And to make things extra creepy, I gooped (that's a word, right?) lots of paint on my letters so they would drip and add to the sentiment.
And there you have it - a Creepy Window Painting just in time for Halloween!
CREEPY WINDOW PAINTING SUPPLY LIST
Acrylic paint
Paint brushes (preferably old or not too nice/expensive)
Dish washing soap
Painters tape
Print-out of Halloween saying
I love Thanksgiving! So even though Halloween is right around the corner, I've been a little preoccupied with making things for my favorite November holiday... case in point: this Thanksgiving Pumpkin.
1. When I was at Michael's recently, I snagged this tiny bag of paper leaves for $1.00 and picked up the cream-colored pumpkin for 50% off the original price.
2. I wanted to adhere the leaves to the pumpkin, so I grabbed some adhesive and got to work (my go-to glue is Tacky Glue - it works on so many things!).
3. I painted a thin coat of glue on the back of the leaves using a foam brush. I was especially careful to get the glue along all the edges of the leaves as I wasn't planning to seal it, so the leaves had to be completely stuck to the pumpkin.
And after a few minutes of gluing, all of the leaves were on the pumpkin!
But I wasn't done yet! I had saved a small space on the pumpkin for a holiday sentiment. I traced out my favorite Thanksgiving phrase ("Give Thanks") and painted over it using basic craft paint (I use Americana).
And that's all it took to complete my Thanksgiving Pumpkin.
THANKSGIVING PUMPKIN SUPPLY LIST
Plastic/foam pumpkin
Paper leaves
Glue
Foam brush
Acrylic paint
Paint brush
I've seen beautiful, felt garlands popping up all over the DIY blogosphere lately and I've been dying to try my hand at one! So when I was at the craft store recently, I strolled down the felt aisle... and when I spotted this felt color combination I was completely inspired to make an Autumn Felt Garland.
1. I started with 5 different colors of felt, left over templates from my Paper Bag Leaf Wreath, and some brown embroidery thread.
2. I took one of my leaf shapes, and traced it as many times as I could onto a piece of printer paper. Then I went through my "sewing bin" and grabbed some straight pins and my fabric scissors.
3. I made a stack of felt 5 pieces thick (one piece of each color) and pinned my page of leaves to the top.
4. And while I watched TV, I cut out all those leaves! It didn't take very long at all, and I was able to get 60 leaves out of 5 pieces of felt!
Once I had separated all of the leaves I had cut, I laid them on top of each other in a Roy G. Biv pattern (I couldn't help myself). I overlapped one end of a leaf to the next before pinning them all together.
After I had pinned my garland, I lugged out my trusty sewing machine (which is older than I am and still in working condition, which blows my mind every time I use it!) and simply stitched all the way down the garland. I'm not a fan of measuring unless it is absolutely necessary, so I eye-balled the sewing and tried to keep the line of stitches down the middle of the leaves.
And truth be told, I could have been done after the sewing... but I wanted a one last touch of autumn... so I hand-stitched using embroidery thread over the line I had just stitched with the sewing machine.
5. Starting on top of the garland, I started by inserting the needle a little less than half an inch from the previous stitch.
6. When I brought the stitch up from the bottom, I actually brought it up behind the the stitch I had just started, making sure the needle came up between the strands of the embroidery thread.
7. I especially like this stitch because it creates a continuous line of color, as you can see!
And after all that stitching, my garland was finally finished!
Here's an up close shot of all that hand stitching... kind of fun, right? And I used all of the strands of the embroidery thread (rather than splitting it up), so the stitching really stands out!
And here is my finished garland, hung on my entertainment unit
I really like the way this turned out... and for a an hour or two of effort, this garland really adds a pop of festive color to my place!
AUTUMN FELT GARLAND SUPPLY LIST
Craft felt (5 pieces of approximately 9x11inches)
Embroidery thread (I used just under 2 skeins on this project)
Leaf template
Printer paper
Marker
Straight pins
Scissors
Thread
Sewing machine (you could skip this step if you wanted to!)
Embroidery needle